


We’ve been hard at work for the last few months developing new members of our Sense /By SC Robotics product line. The main focus up till now of these devices has been to build a solid hardware solution that can operate in harsh environments with low power requirements, harvesting data uninterruptedly in remote locations exposed to weathering and on battery/solar power. Nonetheless, all our Sense devices are based on modern 32 bit microcontrollers, with sufficient processing power to allow for encryption on the fly and implementation of automated algorithms on the edge.
Specifically we have been optimizing our solutions for implementing Precision Agricultureprojects, and one of the key factors is extracting valuable information and trends from the multiple sensors integrated. Due to the distributed nature and location of the deployments, most of the analysis of this data is currently performed on servers in the cloud, but the need for data traceability directly from the source and offline analytics and decision making has been increasingly mentioned.
In the past we have developed embedded ML solutions using TF Lite, seeing how simple it has become. Still, our data acquisition, pre-processing, feature extraction and model generation is a bit tedious and only semi-automated, becoming quite a chore in itself. Luckily it seems we are not the only ones that suffered this problem, and the people at Edge Impulse have created a free for developers web platform that makes these phases of ML projects quite easy.
The documentation is extensive, with plenty of tutorials that guide step by step all the way through the process. Originally the focus of the platform was on arm architecture based microcontrollers, although their engineers are continuously collaborating with manufacturers to expand their ecosystem quite a bit.
One of the architectures we missed was the almost ubiquitous Espressif line of devices, as we in particular use the ESP32 quite a bit in our On-Site Sense product line, for rapid prototyping and as a WiFi enabler for our other systems, particularly when we want to integrate a device with a cloud platform like Azure IoT or AWS.
Understandably, the obscurity around the processor capabilities and lack of optimized DSP libraries are disadvantages that counter the relatively large amount of RAM available and the dual 240MHz CPU cores, although we have observed efforts by the Edge Impulse developers to support basic image recognition with the ESP-CAM.
Data ingestion directly from the device
One of the cool features we found in the Edge Impulse platform was the integration of embedded devices offered by the Remote Management Protocol and the Ingestion Service.
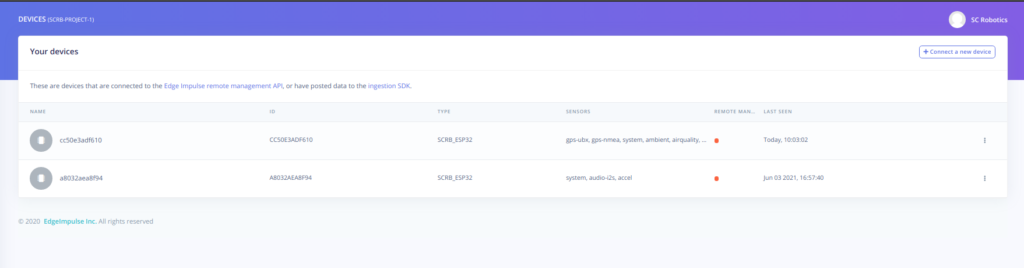
Basically, through a simple websocket connection (remote management) and a REST API (ingestion) any device can be integrated directly as a data source for the Edge Impulse platform. A device registers by sending a JSON or CBOR formatted hello request, among which important details are the project API key, the devices own ID and its capabilities. Once it is succesfully connected, it appears as a device in the Edge Impulse dashboard and is ready to upload data with a click from the web interface.
The ESP-IDF SDK has a very simple API for connecting both as a secure websocket client and performing a secure POST request against a REST web server. So we went ahead and implemented a new Service Provider for our ESP32 Sense devices.
As soon as the device boots up, connects to the network (WiFi or Ethernet) and synchronizes the system time against an NTP server, it establishes a connection with the Edge Impulse websocket server:
W (1047) SENSE: -----------------------------------------------
W (1057) SENSE: Initialize Sense ------------------------------
W (1063) SENSE: -----------------------------------------------
I (1070) SENSE: Starting sensor task
I (1075) SENSE: Loading sensor configuration
W (1080) SENSE: Inserting sensor system at 0 ms, hash 17648cddW (2087) SENSE: Inserting sensor ambient at 0 ms, hash c8d54403
W (3089) SENSE: Inserting sensor ambient-alt at 0 ms, hash 7f87ba9a
W (4091) SENSE: Inserting sensor proximity-vl6180x at 0 ms, hash 160cea5a
W (4091) SENSE: Inserting sensor adc at 0 ms, hash 93adfb8d
I (4098) SYS: free heap: 139.195 kB
I (4364) WIFI: IP_EVENT_STA_GOT_IP
I (4364) WIFI: new ip address: 192.168.1.154/255.255.255.0 -> 192.168.1.1
I (4365) WIFI: DNS server set to 192.168.1.11
W (4370) COORD: Network status updated to CONNECTED
I (4376) sync: SNTP first time initializing -> set poll mode and server_name
I (6383) sync: System time synchronized... (1/1) status 0
I (8884) sync: System time synchronized... (1/1) status 1
W (8884) COORD: NTP correctly synced, start WAN Protocol Provider service
I (8886) EI: NTP sync completed, connect to EI server
I (8892) EI: Connecting to 'wss://remote-mgmt.edgeimpulse.com'...
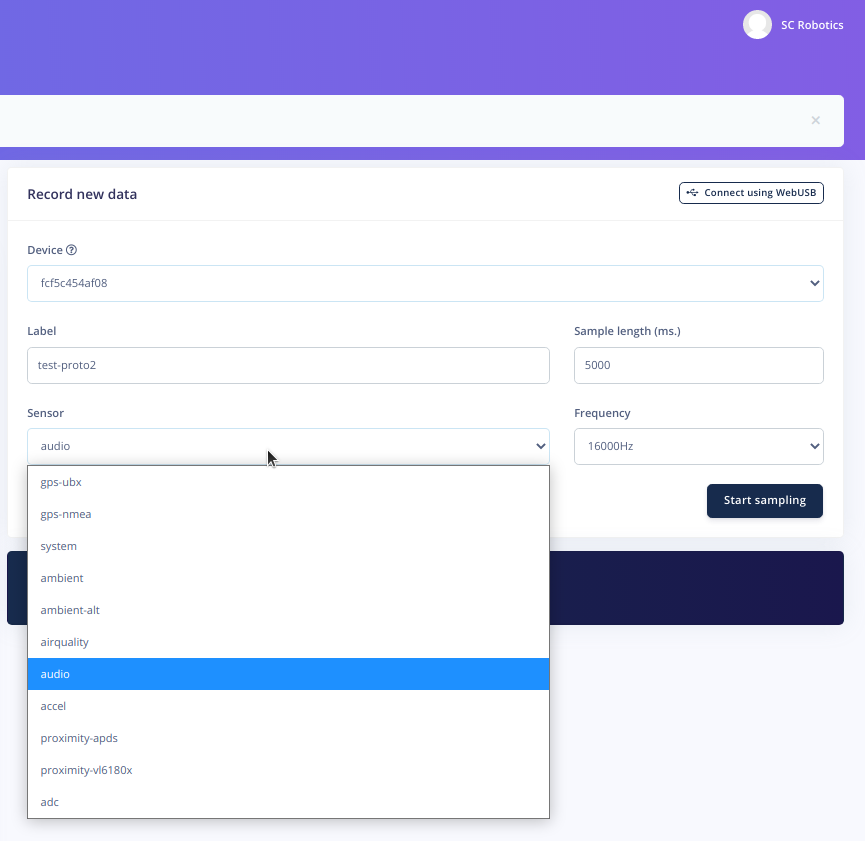
W (10591) EI: EI Web Socket connectedAt this point, the device detects all the sensors that are available (and enabled) listing them in the Hello package along with the API Key of the project it wants to be currently associated with and its ID:
"{"hello":
{"version":3,
"apiKey":"ei_***",
"deviceId":"fcf5********",
"deviceType":"SCRB_ESP32",
"connection":"ip",
"supportsSnapshotStreaming":false,
"sensors":[
{"name":"gps-ubx",
"maxSampleLengthS":10,
"frequencies":[2]},
{"name":"gps-nmea",
"maxSampleLengthS":10,
"frequencies":[1]},
{"name":"system",
"maxSampleLengthS":10,
"frequencies":[0.01]},
{"name":"ambient",
"maxSampleLengthS":10,
"frequencies":[0]},
{"name":"ambient-alt",
"maxSampleLengthS":10,
"frequencies":[0]},
{"name":"airquality",
"maxSampleLengthS":10,
"frequencies":[0]},
{"name":"audio",
"maxSampleLengthS":10,
"frequencies":[16000]},
{"name":"accel",
"maxSampleLengthS":10,
"frequencies":[400]},
{"name":"proximity-apds",
"maxSampleLengthS":10,
"frequencies":[400]},
{"name":"proximity-vl6180x",
"maxSampleLengthS":10,
"frequencies":[400]},
{"name":"adc",
"maxSampleLengthS":10,
"frequencies":[400]}
]
}
}"
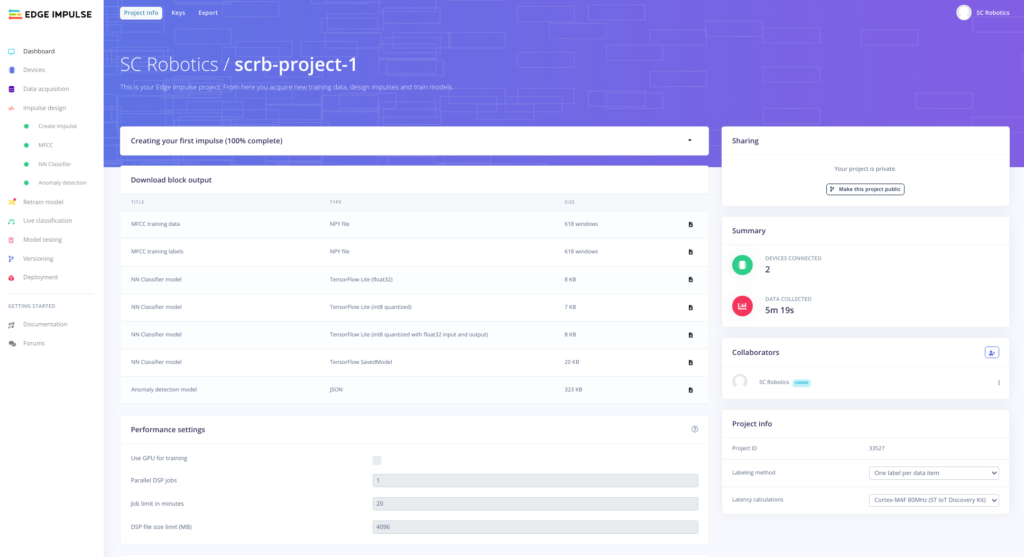
I (11196) EI: correctly connected to Edge Impulse!Success! From now on, the device is listed in the data acquisition panel of the web platform, and with no further physical intervention on the hardware itself, we can capture sensor data directly from one of our deployed systems, on location.
From here onwards, the process of assigning tags to the data, splitting in training, test and verification datasets, segmenting data, designing an impulse and applying processing and learning blocks prior to actually training a Neural Network is performed in a click-and-continue assistant manner. All the steps are well described in numerous tutorials and the documentation, and the devs are quick to respond on the Edge Impulse Forum.
Finally, once you obtain a satisfactory model that classifies you sensor data to your heart’s desire, it comes time to deploy to the devices firmware. Again, the ESP32 is not one of the officially supported platforms, so there is no native option to directly generate a binary image ready for direct flashing, so we must download the source and build it ourself.
Deploying on the ESP32
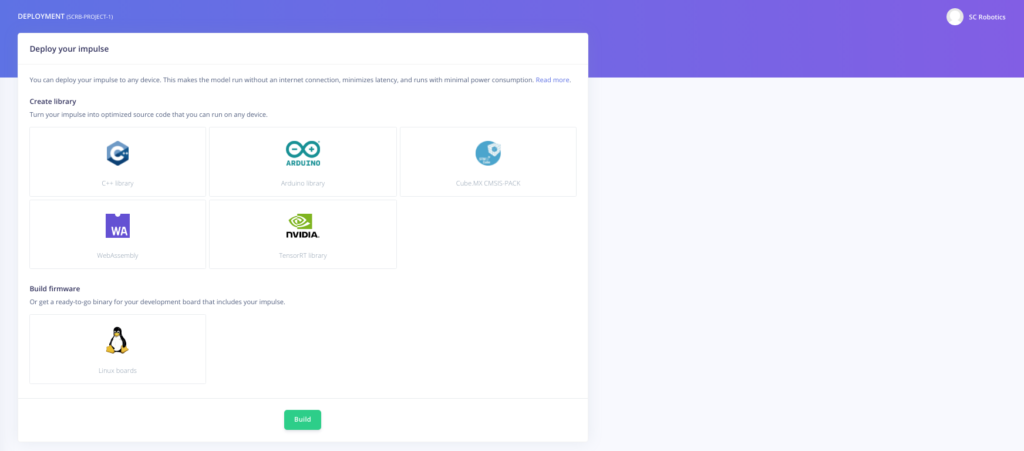
The official Edge Impulse GitHub repo contains a sample project for image classification based on the ESP-CAM dev-kit, with instructions on how to download the code and compile it for an ESP32 with an Arduino or Platform IO development environment.
We generally work directly with the ESP-IDF SDK. Luckily, selecting the Arduino Library option on the deployment page gives us a compressed file with code that requires next to no modifications to include within our CMake ESP IDF project.
In our case, since the project was called scrb-project-1, we get a folder called scrb-project-1_inferencing. Within this folder, we get a couple of folders: examples (which has sample arduino projects for implementing our model on one of the Edge Impulse supported arduino dev boards – in our case an Arduino Nano 33 BLE) and src, the folder we are interested in. There is also a library.properties file, relevant for the use of this source code directly as a PlatformIO library.
For simplicity’s sake, we renamed the src folder as ei and copied it directly into our ESP IDF main folder. A more serious approach would be to design it as a component, but laziness is a key factor of our design process. Inside this folder, all we require is to include a single header, scrb-project-1_inferencing.h (again, dependent on the name of our project). Upon compiling, we get an error:
../main/ei/scrb-project-1_inferencing.h:28:10: fatal error:
Arduino.h: No such file or directory
Of course, we are not in an Arduino environment. Commenting that line makes the compiler happy, and so it seems we are underway!
From here on, the process is similar to what can be observed from the examples. Memory allocation for data buffers and tensors, feeding that info into the algorithm and observing expected results… All these processes are dependent on the nature of the data source and the type of algorithm implemented, and beyond the scope of this post.
Notwithstanding the lack of hardware optimization for the ESP32 architecture, we were capable of running real-time audio event recognition with a 16KHz sample rate, so for most of our applications that involve accelerometer data or lower frequency signals this could be a valid solution, taking into account the sub-optimal nature as far as power consumption is concerned.
Significantly, the time assigned to DSP pre-processing was an order of magnitude larger than the actual ML and data acquisition time. Definitely where a well optimized DSP library would come in handy…
Where to now?
We started off liking the idea of quickly prototyping simple machine learning models onto an ESP32 board, obtaining proof of concept of what we can achieve with Embedded AI on our line of On-Site Sense products. The data acquisition and pre-processing phases appeared as a significant bottleneck, specially as multiple phases of sensing, ingestion, storage in database and extraction through scripts were necessary even for simple projects.
The Edge Impulse Remote Management and Data Ingestion APIs allowed us to, with the same hardware we use as a sensing and monitoring solution, upload the data and have it tagged and ready to train. Direct integration into the hardware takes a lot of the preparatory and tedious work out of the process.
Two interesting paths lie ahead of the SC Robotics team in our Sense development roadmap:
Edge Impulse Gateway and Hybrid Deployment
Right away the implementation of the mentioned Edge Impulse APIs means the ESP32 can serve as a gateway over serial comms to an offline device. Our Remote Sense products include STM32 arm M4 architecture microcontrollers that can benefit from more of the optimizations developed by Edge Impulse as far as efficiency are concerned. These devices are more tuned to low power operation and often have limited bandwidth cellular uplinks.
In an initial development phase, the combination of both MCUs can facilitate rapid training of ML on the exact same sensors that later the device will use during the classification phase in a cost effective manner. Correct power management (enabling and disabling the ESP32 co-processor on demand) can make this a scalable solution for an iterative design processes.
Automated deployment of ML on the Edge
All current Sense and future Sense Pro devices have built-in secure OTA, so we can easily deploy updates and bug fixes to live devices.
Some of our current projects have an initial deployment phase with a factory programmed firmware set up to ingest data into an Edge Impulse project. The ML model is generated, deployed and a binary image is compiled, after which we send the same device an OTA upload command and bang! ML on the Edge.
Post build scripts and continuous integration in our git servers already allow for automated firmware image generation and uploading to our cloud servers. It is easy to envision the automation of the process of downloading the generated model source code, making the necessary modifications, generating a binary image and sending the OTA upload command to a selected device.
Upload, train, click and… Deployed!
Photo credits: Yan Krukov from Pexels